Having found myself a fairly recent Japanese import Forester STI. I wanted to give the underside the best chance of surviving UK winter roads as I could. Leaving it with no protection as it came from Japan was not an option.
Too many newly imported cars are given a quick and cheap spray over the underside by the UK importer which can end up causing more problems than it solves.
The problem with a quick spray over the underside with some waxoil style stuff is that not everything is covered properly and there is no protection of the cavities. Also the areas that are covered tend to dry out, shrink and allow moisture through then trap it under the coating which makes matters worse. The areas that have no protection on can also suffer with corrosion worse as the chemical reaction that is taking place is concentrated on those exposed areas.
Having had a few old cars in my time which are all susceptible to rust, particularly the classic Minis I’ve owned the whole time I’ve been driving, I had a pretty good idea of what I wanted to do. I also did some research on what various coating options are out there. I have a compressor and a Schutz sprayer so can choose products that require compressed air for spraying.
I decided on the complete process I wanted and placed an order with Rustbuster and Dinitrol.
Pictures and description of the full process I carried out on my Subaru Forester STI can be found here
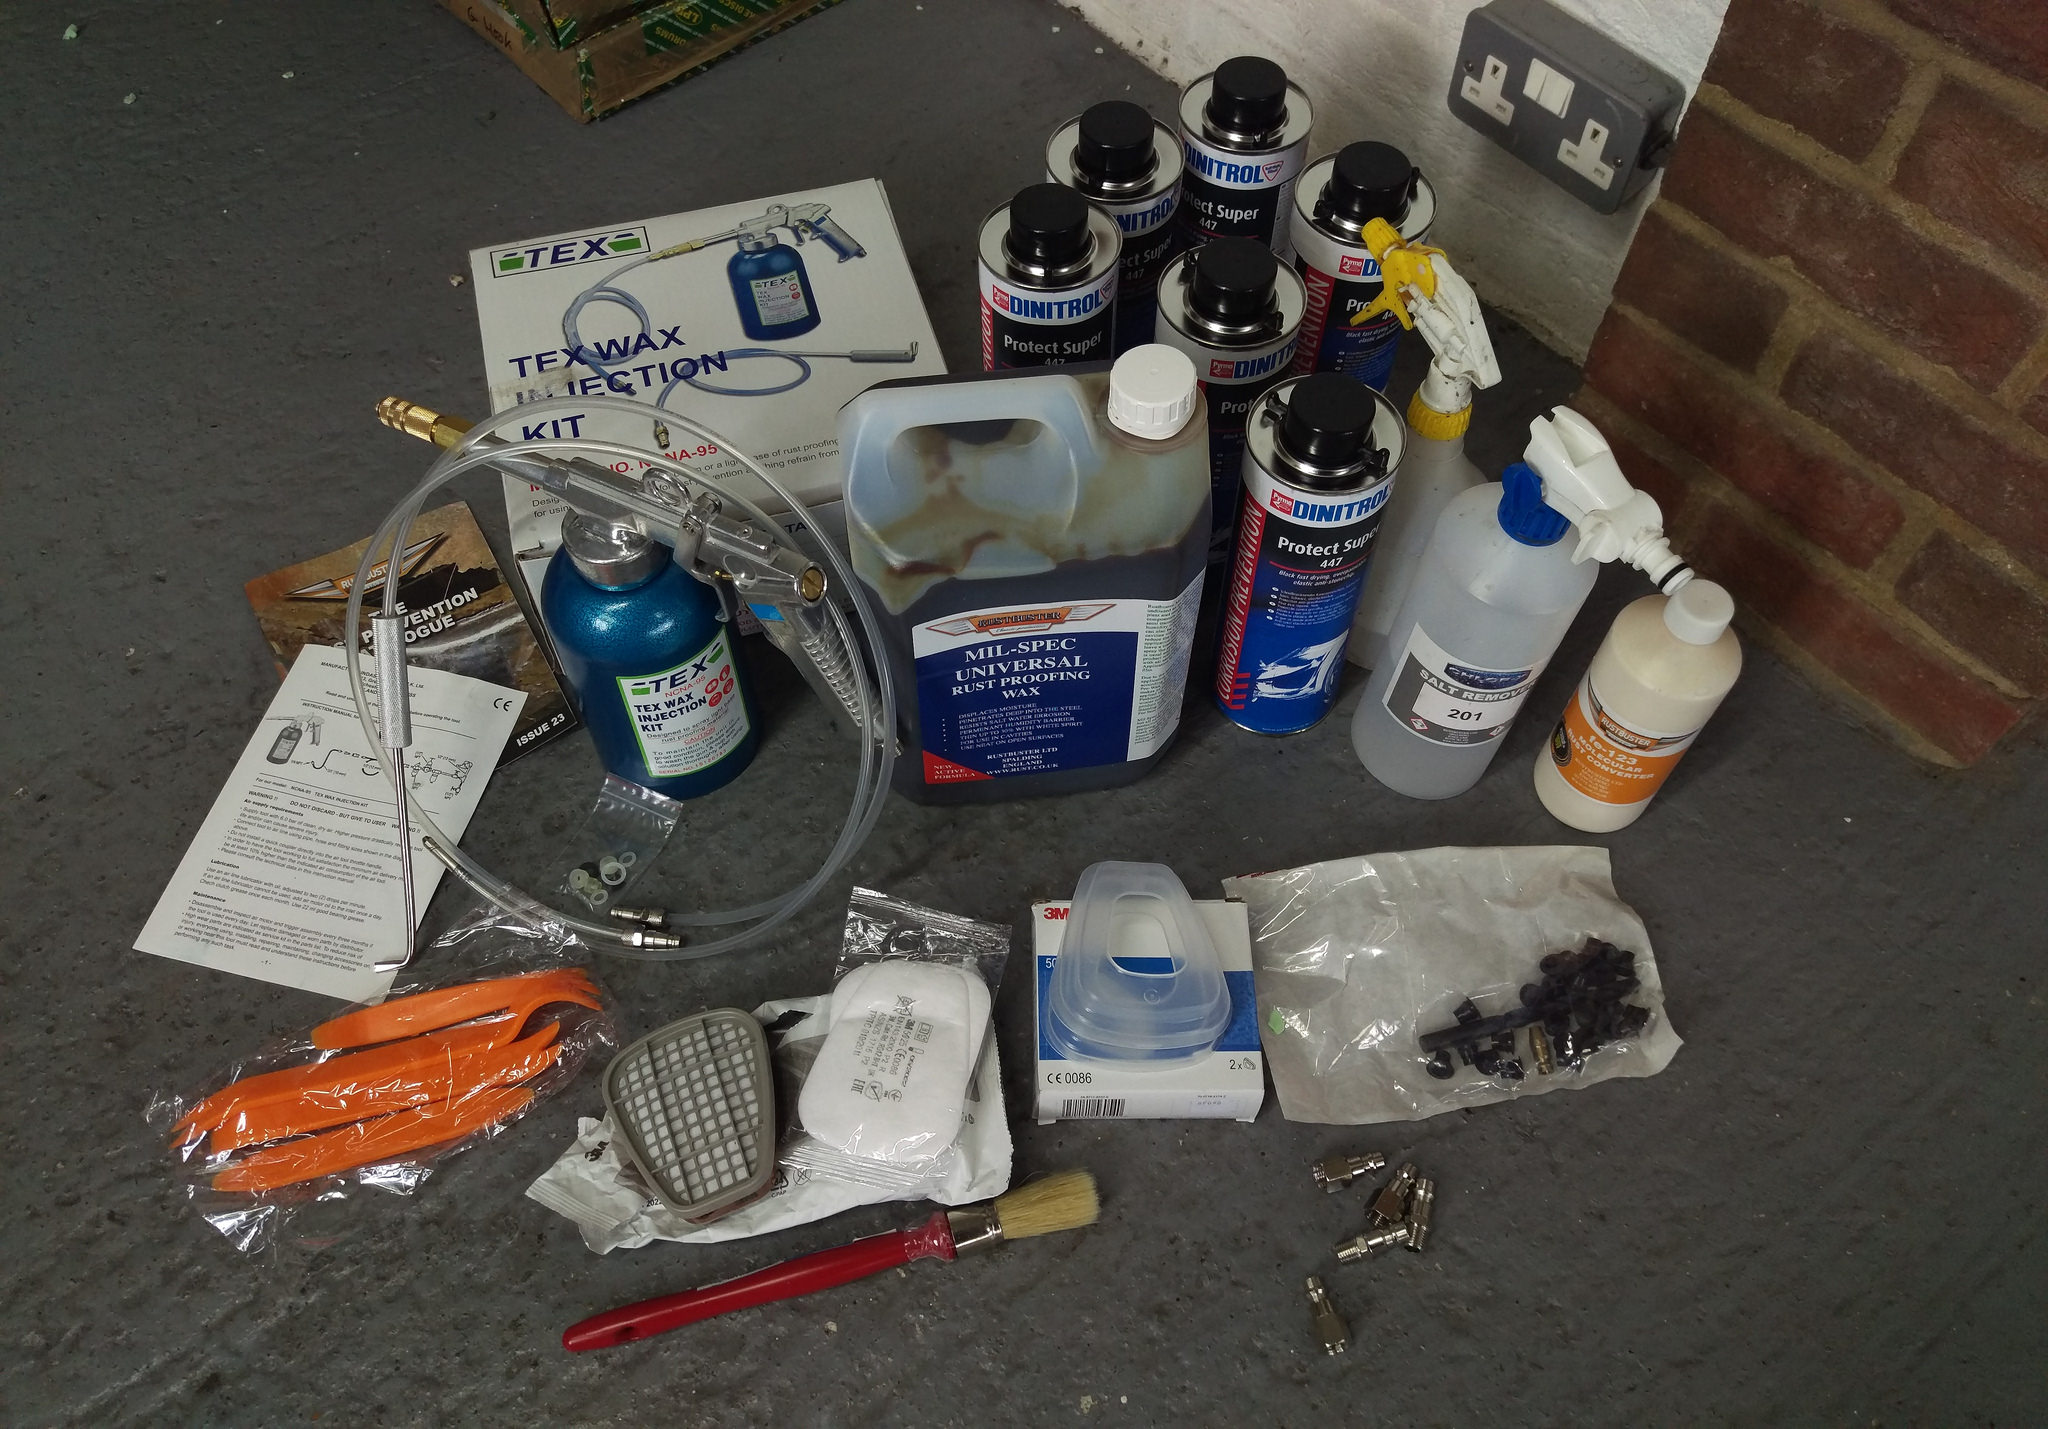
Below is a list of all the products I used, some information about them and some explanations why I chose them.
The complete kit I bought

ChlorX Salt Remover

“Dry salt crystals cling so well to the surface of steel that the treatment has to be able to get behind the salt to lift it from the steels surface. Power washing alone cannot do this. A sample coupon of salt contaminated steel boiled for one hour in water will only remove 90% of contaminant salt, it is this hard crystallised salt that requires a special surface surfactant to get behind the crystal and lift it from the surface our formula achieves this at a molecular level not previously available on the UK market.”
The car I bought was in good condition underneath but had been driven in the UK for around 18 months since being imported from Japan. So it was best to give the underneath a good clean to remove any dirt and especially to remove any residual road salt before applying any coatings.
FE – 123 Molecular Rust Converter
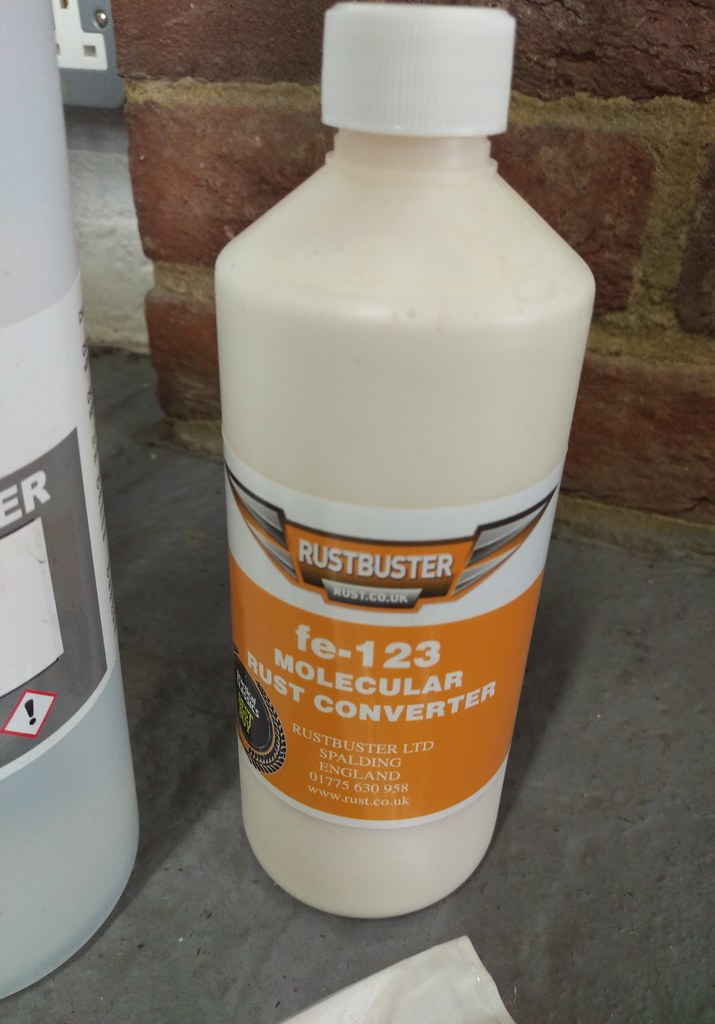
“Fe-123 envelopes rust at a molecular level, developing into a neutral layer which exists between the steel’s surface and the atmosphere. This neutral layer prevents the migration of ions so that no chemical reaction can occur at the metal’s surface. Recent independent testing by ‘PRACTICAL CLASSICS’ magazine April 2011 proved that fe-123 not only converted the rust but also left a foundation that could be painted over without neutralising and came BEST IN TEST scoring ten out of a possible ten points. We where also awarded best in test by CLASSICS MONTHLY in their 2011 long term test results.”
I got this to use on any areas of surface rust I might find. This is basically the same as the Bilt Hamber stuff I’ve used before but that was running out so I thought I’d get some of this. This is slightly overkill as the other coatings I will be applying sort of do the same job and contain rust inhibitors but this was worth using on a few areas that are more prone to rust so had started to a little.
Dinitrol Protect Super 447
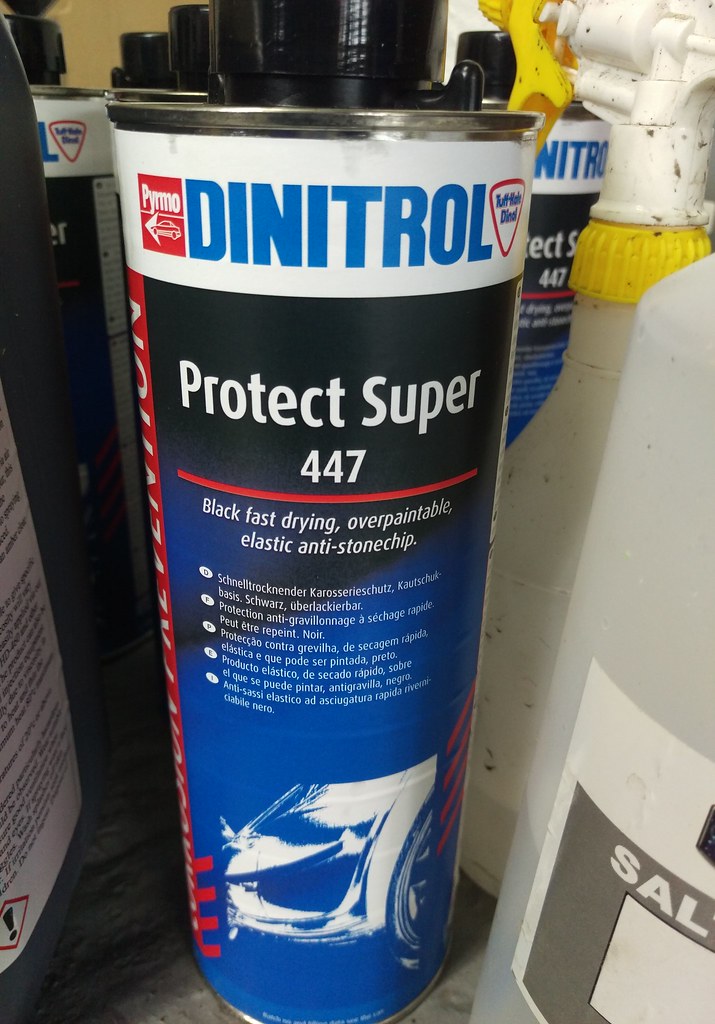
“DINITROL 447 Protect Super is a fast-drying, rubber and resin based auto-body protection agent. Clearly higher rust protection is achieved through zinc additives. Zinc ions also prevent or delay rust formation in areas where the protective film is damaged. DINITROL 447 Protect Super contains no aggressive solvents such as chlorinated hydrocarbons (CFC/CHC), esters and ketones.”
This sprays straight from the can using a Schutz sprayer and air line. It goes on nice and thick and dries to give a really strong but slightly flexible finish so it will take the kind of battering the underside of a car gets without chipping. The Zinc additives to help prevent rust are a bonus.
Rustbuster Mil-Spec Universal Rust Proofing Wax
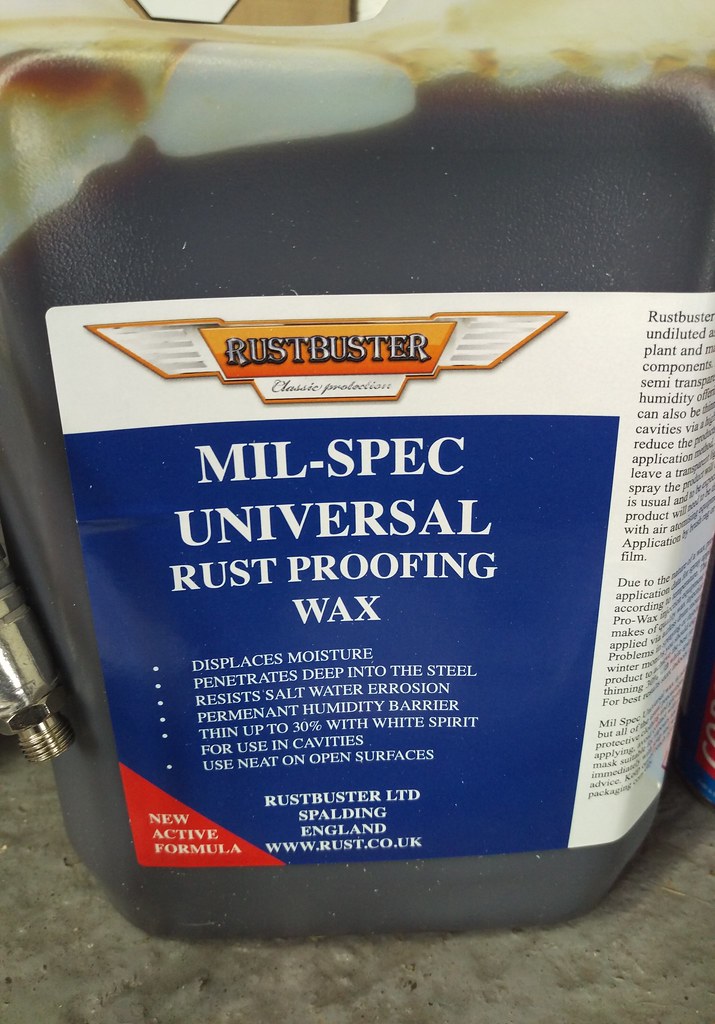
“MIL-SPEC Transparent Rust proofing wax is suitable for hidden cavities or open surfaces. MIL-SPEC penetrates deep into the steel displacing moisture and setting as a soft waxy rust preventing barrier. Remains permanently flexible. Is able to penetrate hidden dirt and existing rust making it the perfect maintenance wax. Self repairing non drying film. When applied to open surfaces MIL-SPEC rust proofing wax forms a dry non sticky surface. Rustbuster MIL-SPEC rust proofing wax is amber/transparent in colour. MIL-SPEC Rust proofing wax surpases ASTM-D 1748 Humidity test and ASTM-B 117 Salt fog test.”
When thinned with some white spirit this is a sprayable wax that will provide an extra layer of protection over the 447 to repel water and I’ve found it also makes washing down the underside of the car much easier as dirt doesn’t stick to it. I also used it for filling any cavities in the chassis. I particularly wanted a clear wax like this so that, if there are any high abrasion areas that do eventually suffer from stone shipping and expose metal, any resulting surface rust will be visible and can dealt with right away.
Rustbuster Pro-Wax injection kit
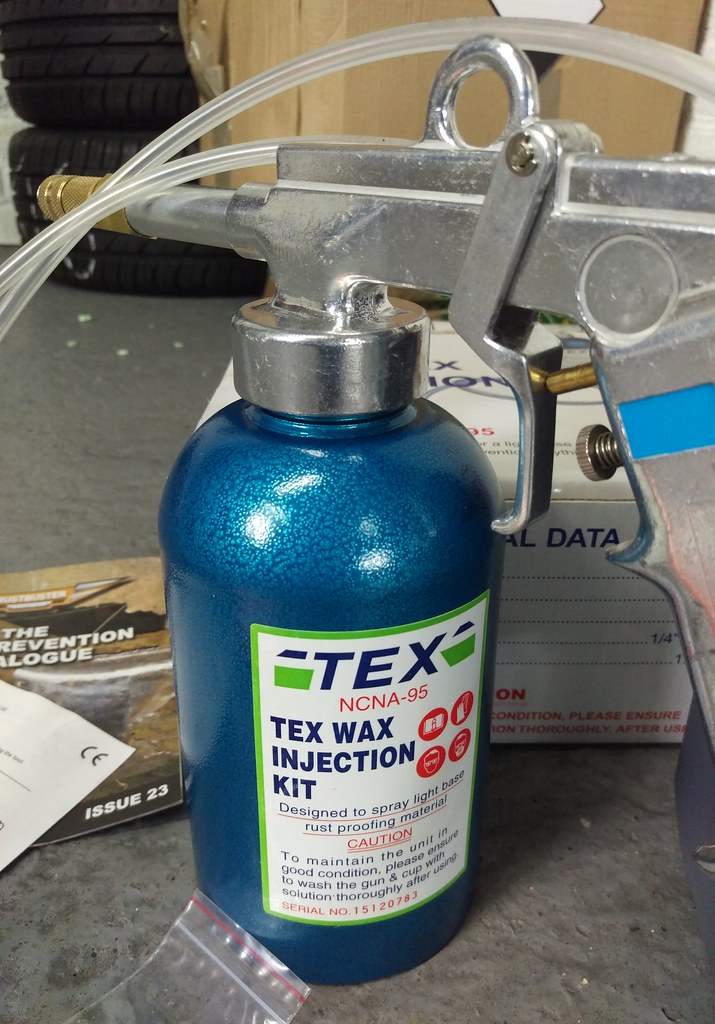
“This is an entry level Professional spray and injection kit and an excellent DIY kit for the restoration enthusiast. The Pro-wax kit comes complete with an 800mm x 360 degree cavity wax injection wand – a Hook spray wand for spraying cavity wax in a fan pattern at 90 degrees – All wands are quick fix attachable via snap connectors. A specially Rustbuster manufactured bullet tip is also included for fine spraying of Higher build underbody waxes.”
At £90 this was a fair bit of additional cost for the job but worth it as it made spraying the underside and filling the cavities so much easier than with other setups I’ve used. It also gives me confidence the cavities were coated well.
Plastic Trim Removal Tools
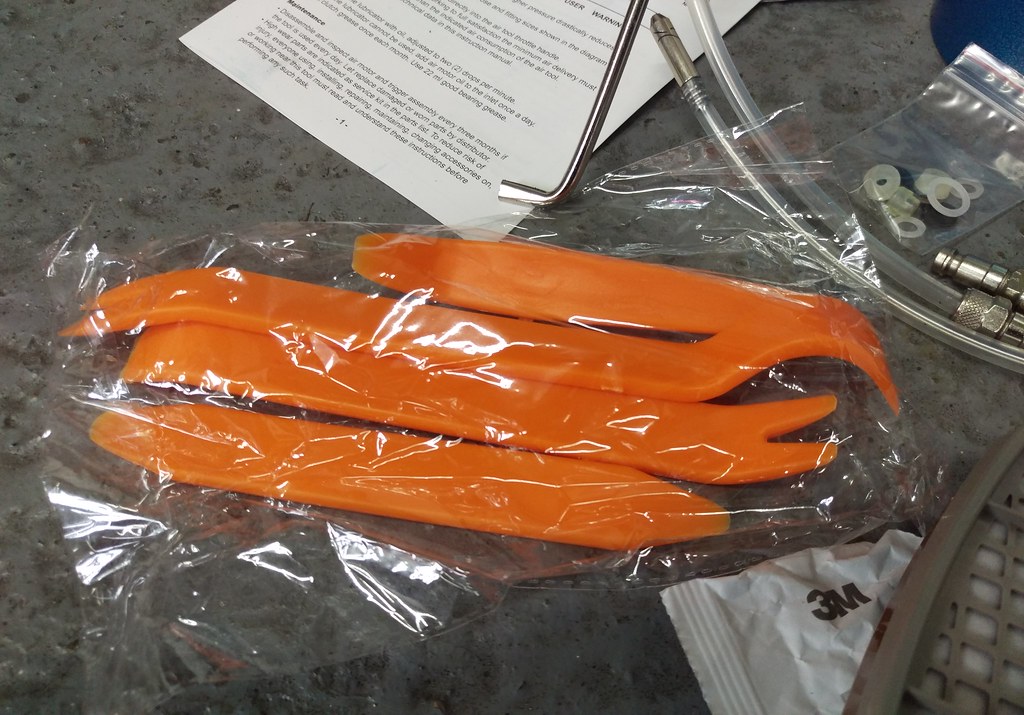
I also got a set of these trim removal tools from Ebay. They make the job of removing the many plastic clips, holding the wheel arches and various bits of trim, a bit easier.
3M Respirator Filters
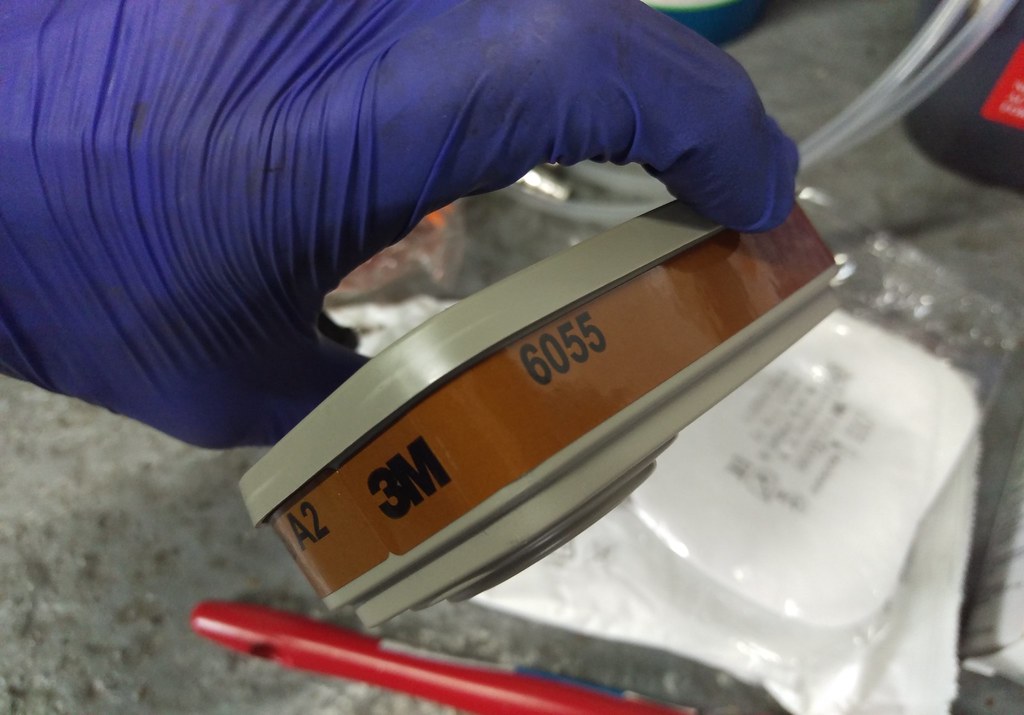

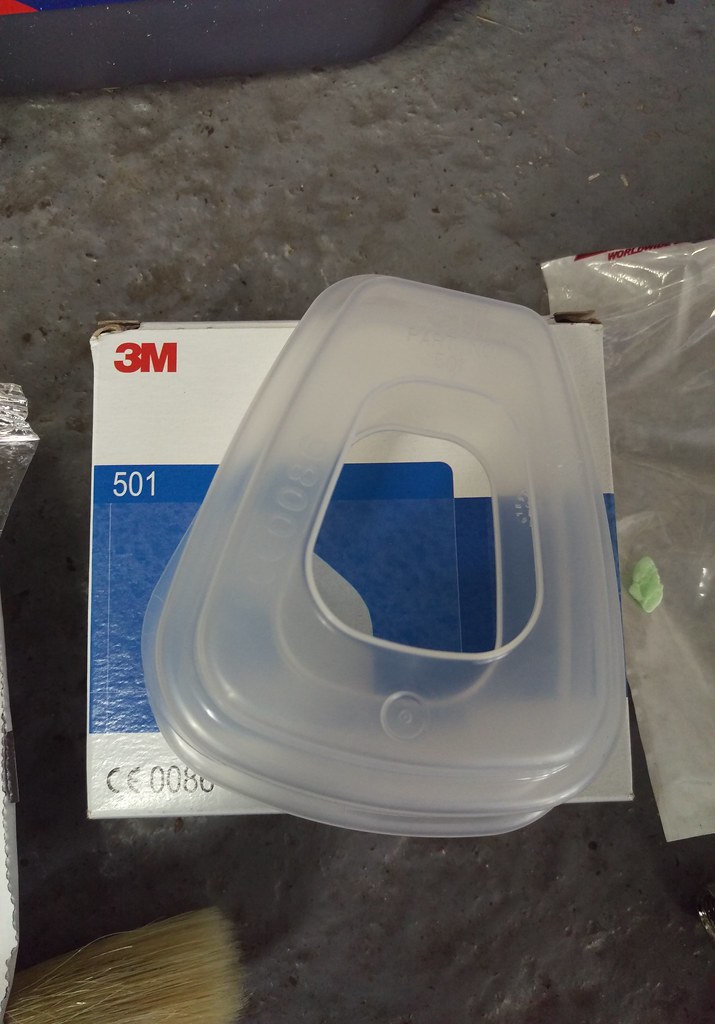
Another important addition to the list was some correct respirator filters for the job. I already had a 3M Respirator (7502) that takes replacement filter cartridges. So after a little research I found the best filter setup for this job seemed to be a 6055 A2 cartridge with a 5925 pre filter for particulate filtering. The pre filter also requires a 501 pre filter retainer.
This is a pretty messy job and though I’m not too fussy about the garage, it is a working garage/workshop after all, I didn’t really want to cover the walls in overspray of Dinitrol or wax. So I also bought some cheap tarpaulins from ebay to hang around the garage so they could catch any rogue splodges of paint or wax.
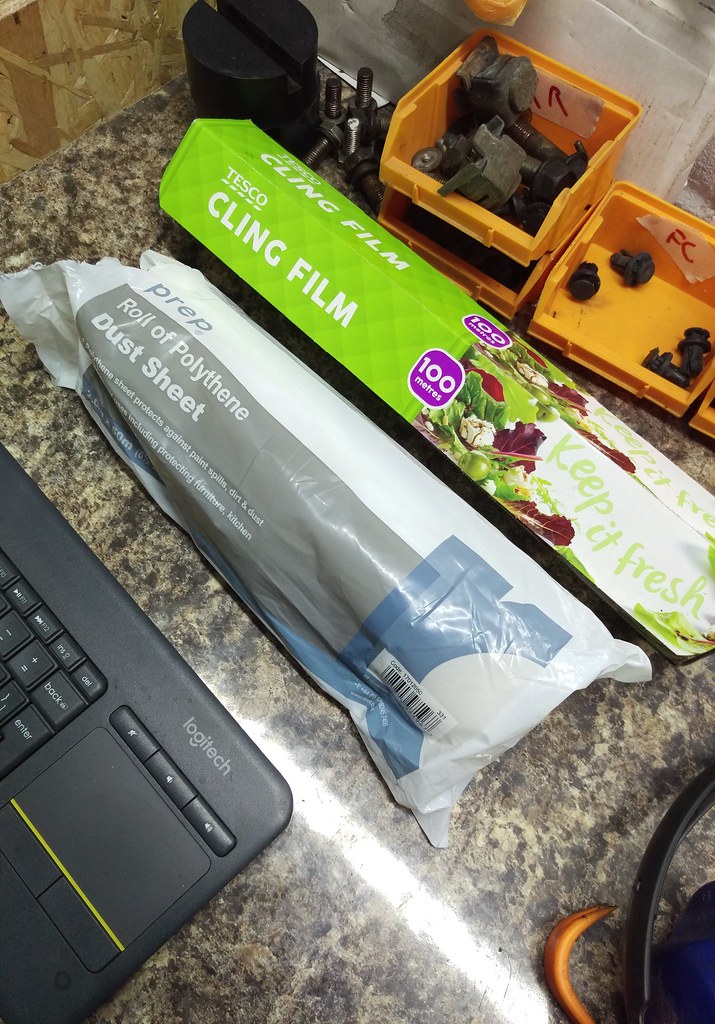
More important than the walls was protecting the bits of the car that I also didn’t want overspray on. It’s easy to kid yourself you’ll be careful and it’ll be ok but if you don’t mask it then it’ll get paint or overspray on it, it just can’t be avoided. So I got a roll of plastic sheet, a roll of masking paper, some cling film and a few rolls of masking tape.
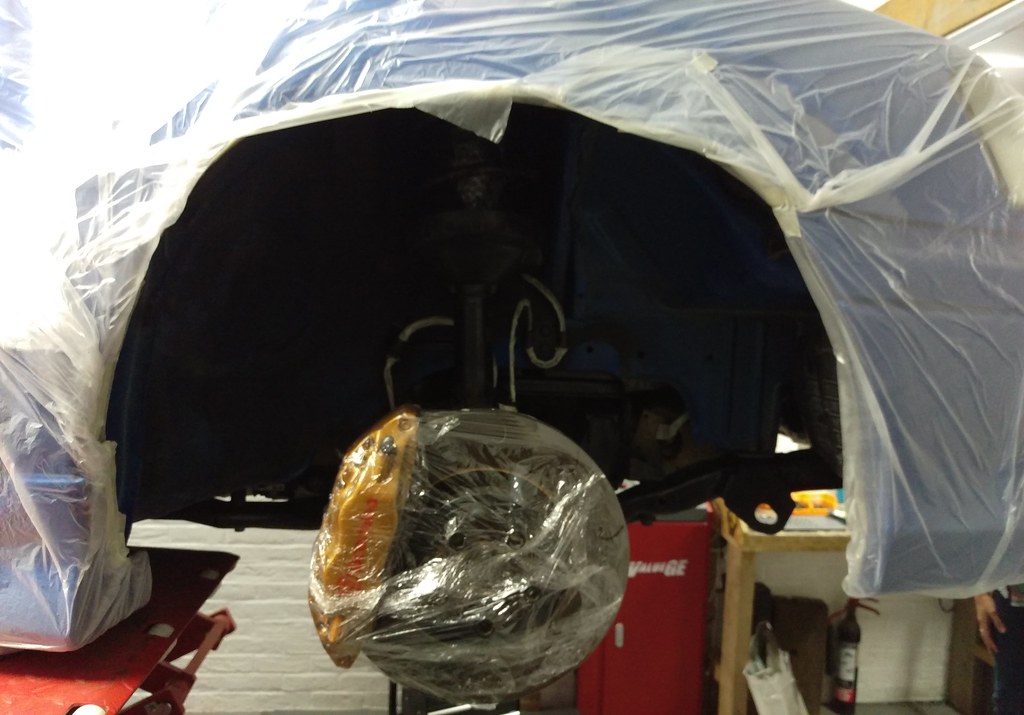
How I had the car masked.
As above, the whole process I carried out with the many pictures I took along the way can be found here